Tag

goals

1-Minute Habits For A Neat Home

By Blog, Quick Organizing Tips, Simple Living No Comments

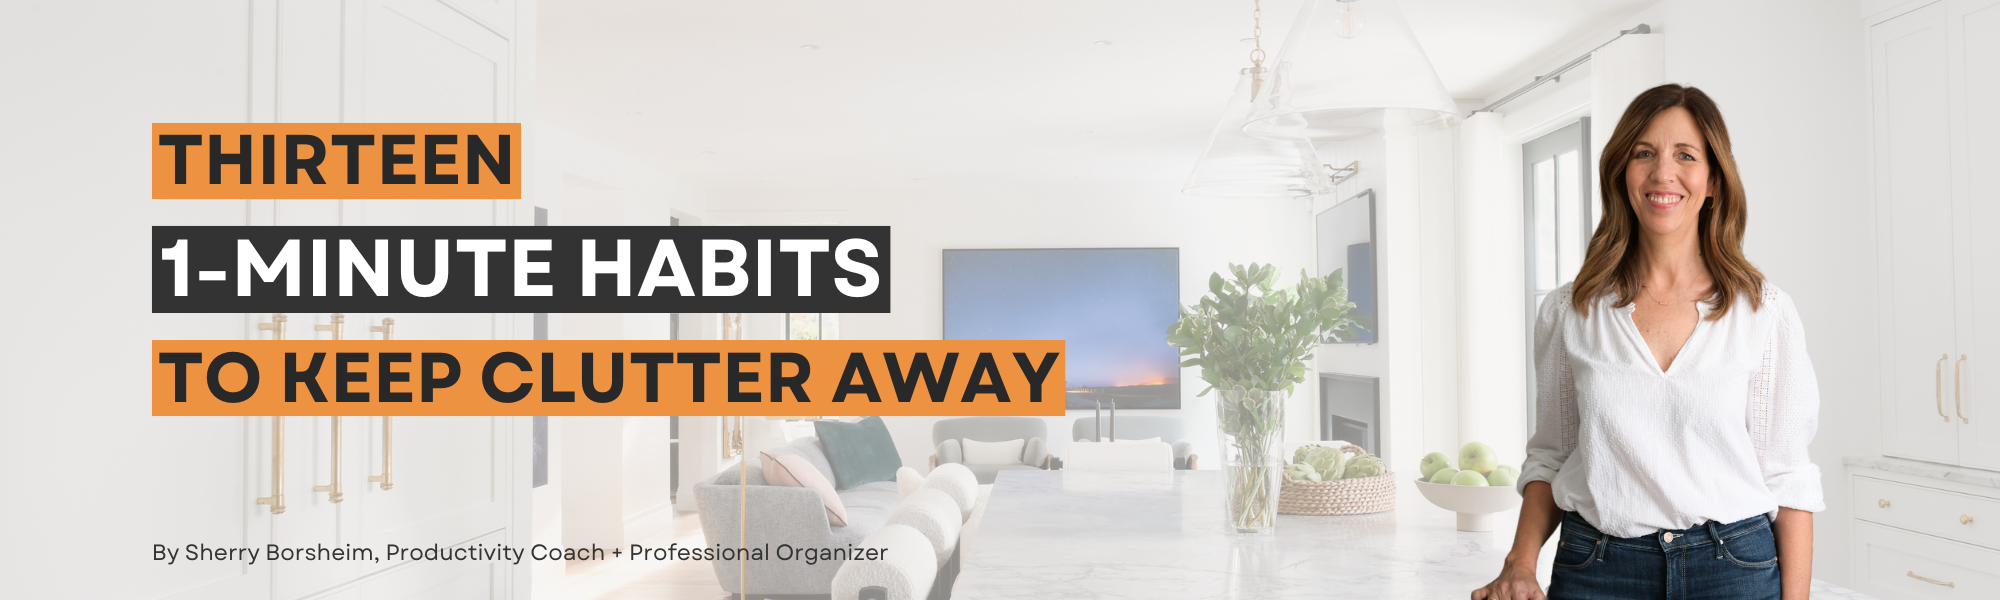
What if I told you that it only takes a few simple 1-minute habits for a neat home and digital space?


After all, everything in life is comprised of small habits that all work together toward a bigger picture.


Decluttering can seem like a never-ending task (in some ways it is), and on top of that, most people never know where to start. I’m here to help break down this stereotype! I want to share with you some 1-minute habits that you can start implementing today. These are going to make big differences in the piles of clutter that you may be noticing around your home and digital spaces (think photos, files, videos, messages, etc.).


Keeping clutter at bay in your home is easier than you think. With these few simple habits, you can maintain your clutter day by day instead of letting it pile up into an all-weekend event. Because let’s be real, who wants to spend a bunch of evenings and weekends decluttering? Not me!


In this article, we’ll explore 13 simple 1-minute habits for a neat home that can make a remarkable difference in keeping your home organized. But first, I recommend you start by filling out this free assessment to see where you should focus your organization efforts:


✨ FREE DOWNLOAD ✨

Home Organizing Assessment

Does your Home achieve the eight dimensions of organization?

Download Now →

1-Minute Habits for a Neat Home


  1. Develop the Daily Tidy-Up:

Setting aside just one minute each day for a quick tidy-up in common areas can work wonders in preventing clutter from piling up. The goal here is to focus on one specific area that needs attention.


You can do this by setting a timer on your phone for a minute. Then, just look around. Where are the piles? If they’re accumulating all around your home, just pick one area for today. You can pick another area tomorrow. Maybe it’s a kitchen counter, the top of your desk, your bathroom surfaces, the pile of clothes on the floor of your closet, or the front entry’s pile of shoes.

I guarantee that if you set the timer, you could have those strewn-about shoes and coats at the front entry all hung up quickly! Everything would have a home in probably a minute or less.


  1. Commit to the “One In, One Out” Rule:

I love this rule. It works like this: every time you bring something new into your home, commit to removing an item. And really get it out of your some, because throwing it in a donation pile by your door usually means it’ll weasel its way back into your stuff again. This rule not only prevents clutter but encourages thoughtful consumerism!


I’ve been practicing this for many years and it’s the best clutter preventer. Many years ago I bought a new salad spinner and I had nowhere in my kitchen to put it. So I had to make room! Something had to go, so I ended up donating a kitchen item that I didn’t use. You could put it in the garage or another area, but that kind of defeats the purpose of this habit. The “one in, one out” rule helps you prevent accumulating too many things and not letting things you no longer need, go.


So start practicing the “one in, one out” rule today! This is a game-changer if you can master this habit. It will make a huge difference. Just think about how many items are in the average home (roughly 300,000). If you keep adding to those items, you’re never going to get rid of the clutter!


  1. Establish Permanent Homes for Items:

The third habit of our 1-minute habits for a neat home is to not let yourself “set it here for now.” Avoid the “I’ll just set this here for now” trap at all costs.


Oftentimes we’ll think, I’m just going to put this on the counter for now. Or, I’m just going to leave my sunglasses here, and I’ll throw my keys there… I’ll put them away later. Then what happens is when you need to leave, you can’t find your keys and you’re in a panic to get out the door!


Take the time to make sure each item has a designated, well-thought-out home. When deciding where you will keep an item think about how you would like to access it, how frequently you use it, and who else in your household uses it. Then always, always, always put things back where they belong!


If you truly can’t do it right away at that moment or you’re in a rush, then at least make sure you do it the same day. And make sure not to drop things in random places as you might have to go searching to find them again!


  1. Sort Mail Immediately:

Don’t let paper clutter accumulate. I’m sure we all know how grueling sorting through a ton of loose papers, flyers, and envelopes is. So to avoid this, sort through your mail as soon as you get it.


When I go to the mailbox, the junk mail doesn’t even reach our house. I sort it in the car after I pick it up, and when I get out of the car, I walk through the garage and drop the recycling straight in the bin. The important mail comes with me into the house, where I don’t toss it on the counter but instead file it and address important items accordingly.


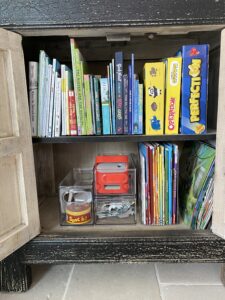
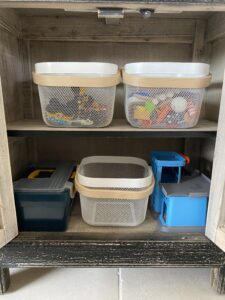
  1. Quick Closet Checks:

Closets are sneaky places. “Out of sight, out of mind” is an all too easy mode of thinking when doing a quick tidy-up. We’re all a little guilty of stuffing things away for a quick win!


Most of these 1-minute habits for a neat home can be applied in closets. Regularly take a minute every so often to straighten up closets, shelves, and drawers. When you open up your front entry, bedroom, linen, or laundry room closet, just quickly tidy something up. It will only take you a minute. Straighten up the stacks of clothes or linens, rearrange the coats into sections according to their owners, or pick up clothes from the floor. There’s no need to spend hours, just take a quick minute and straighten something up.


The next time you open that door, it’s going to make you smile! Plus you’ll likely be motivated to continue on with another shelf or section in that same closet. This small effort can lead to a consistently organized living space.


  1. Keep up with Digital Declutter:

Regularly organize your digital life. This area can easily become a mass arrangement of mixed-up photos, files, and videos if not routinely looked after. Next thing you know you’re paying for extra cloud storage you never really needed or jamming up space on your computer.

Spend a minute today to categorize your photos or files on your phone or computer. Try to keep up with doing this a little bit every day to avoid the overwhelming task of organizing a massive backlog. Simply go to where you keep photos that you took for the day and organize them into a folder. Delete anything that’s blurry, and narrow down your 10 photos of the same thing into one or two. Quickly sort them into a folder. You can do this by theme, year, holiday, event, etc. Whatever it may be, just pick a simple type of folder and make sure that you organize your photos for the day, at least every few days.


  1. Restock and Rotate:

Before you run out of pantry items, household essentials, or cleaning products, make sure to restock and rotate what you have. This prevents last-minute rushes and promotes a smoother daily routine.


Let’s say you’re the one who finished up the peanut butter. Why not put it on the grocery list in that moment? If you know your back stock has some more peanut butter, make sure you go and put the new peanut butter in place of the one you just finished.


And you know what? Other family members are going to thank you. They will start to recognize that you did something for the household, and they will want to return the favour to you. Never again will you be the person who drank the last of the milk or used the rest of the peanut butter without taking care of the replacement!


  1. Put Things Away After Use:

Rather than leaving items out after using them, make it a habit to put them back where they belong (in their homes you made from tip #3). This reduces future frustration and saves you a lot of time in the long run!


Let’s say you have some returns that you need to mail in. You’ll need scissors and tape to tape up the box and put the return label on. So you’re using two things, the scissors and the packing tape. When you’re done, simply put them back. This way the next time you or someone else needs those items, they’re going to be in the spots they always are.


Trust me, it’s going to save you a lot of frustration and greatly reduce time spent looking for something that is not in the place it’s supposed to be.


  1. Wipe Out Shelves and Surfaces:

This tip is one of my favourites of the 1-minute habits for a neat home. I love wiping out pantry shelves or the fridge drawers before I put groceries away. Why? Because I love a crisp, clean fridge. Plus I’m saving myself from having to do the grueling task of deep cleaning the whole fridge, freezer, and pantry.


Is it always perfect? No, of course not. But if I see crumbs during the week or the shelf is noticeably dirty, I will take a moment to wipe it. It just takes a quick wipe! If I’m already clearing the counters or I’ve already opened the fridge for something, I’ll also deal with those spots in the same moment.


It’s going to save you time and energy in the long term. So make sure if you see something you clean it right away. These small actions add up to a consistently cleaner environment.

  1. Evening Surface Sweep:

Before retiring for the night, spend a minute tidying up common area surfaces.


Take one minute and just tidy up all the beverage bottles, cans, and glasses that may have been left out if you were sitting on the couch watching TV. If the pillows are astray and you were using a blanket, why not quickly do a reset? Fluff the pillows up a bit, put them back where they belong, and fold the blanket away. When you come back to this space in the morning, the area will be clean.


If dirty dishes in the sink first thing in the morning bothers you, throw a load in the dishwasher at night. Whatever those little irritations may be for you, focus on them. Personally, I like to wake up and know that I have a relatively clean kitchen and living room. Otherwise I’m like, “Oh, I gotta deal with that, but I don’t have time right now and I’m already late running out the door.” It ruins my morning! So do an evening surface sweep and just notice what’s piling up. The goal with these 11-minute habits for a neat home is to ensure your living spaces are welcoming the next morning.
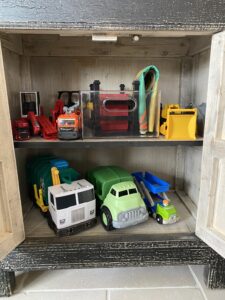


  1. Toy Basket Routine:

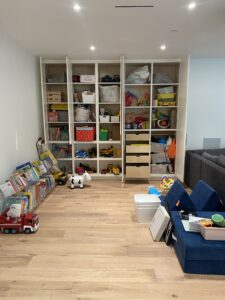
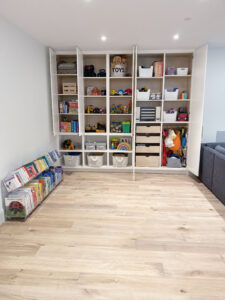
If you’re a busy mom with kids who bring their toys out everywhere, implement a nightly toy basket routine! What if you had a toy basket that you could take around to collect up all the toys in? It doesn’t need to be organized. At least they’ll be in a basket and not scattered all over the floor. Doing it consistently will lessen your weekly cleaning load as it takes forever to clean it all up if done on a weekly basis.


Practice this right before bedtime. Set the timer for one minute and make it fun! Play some music, include your little ones, and make it into a game. If they pick up their toys three nights a week, maybe they get a little extra sticker on their chore chart or a treat at the end of the week if they do it for all five weekdays.


This immensely helps to prevent clutter from piling up all over the house, because we know how quickly toys can get scattered all over the place!


  1. Practice the “Wait and See” Approach:

Before making impulsive purchases, pause for a moment. Give yourself time to think about whether you truly need the item.


Before you checkout at a store or hit order on your Amazon account, ask yourself, “Do I really need to buy this?” A trick I like to do is switch to another browser tab or go down another aisle to think about it twice. Remember, you’re now practicing a “one in, one out” rule. So if you keep bringing new stuff in, something’s gotta go!


When I go to buy a new pair of shoes, I’ve already decided on what I‘m going to donate or get rid of. I’m constantly decluttering my shoes and clothes closet so I have extra room for if I bring something in unexpectedly. But if you tend to do a lot of shopping and the clutter is piling up quickly, consider just waiting an additional minute. Then ask yourself, “Do I really need that sparkly new kitchen gadget?” Of all the 11-minute habits for a neat home, this one works great for those who love to shop 😉


Give yourself time to think instead of making these fast impulse buys. Often when you take the time to pause, it helps you to realize if you really need the item. Your wallet will thank you!


  1. Celebrate Progress and Share Tips:

Finally, celebrate your successes! Changing existing habits or adopting new ones is not easy, so you deserve to celebrate each step! Another way to keep yourself motivated is to share your organizational journey with others (like in our Club!). Encourage more friends and family to adopt these habits, and learn from each other’s experiences!


Decluttering your home doesn’t have to be an overwhelming project that takes up your vacation time. By incorporating these simple 1-minute habits for a neat home in your daily routine, you’ll be gradually transforming your living and digital spaces each day!


Remember, small actions lead to significant results.


So, which of these habits are you ready to embrace? Share your thoughts in the comments below and let’s get started on this journey to simplify our lives together!🙂


Like this article?

You’ll love this one👇🏼

10 Day Decluttering Challenge


Don’t know where to start decluttering?


Sign up for my free newsletter so I can send you the best organizing tips and strategies each week.

(and some freebies, too!)

Sign up here →

Small Laundry Room – Big Organization

By Blog, Home Organizing, Simple Living No Comments

Organizing a small laundry room can seem like a pretty big, intimidating task. But with the right strategies and organizing tools in your belt, you can easily transform it into an efficient, functional space!


Being realistic, organizing a small space takes a lot of thought. There are many aspects to consider when setting up any type of organizing system in a small area.


There’s the challenge of physically fitting all your items, plus making sure they’re all actually accessible, and on top of that, it’s got to look nice too! With a bit of forethought, organizing a small laundry room can be a lot of fun and very rewarding when you put in the right organizing systems.


Let’s get right into these valuable tips and tricks for decluttering, utilizing vertical space, and creating a well-organized laundry room.


And who knows? You might find yourself enjoying your next laundry day! 😉


Organizing A Small Laundry Room


Step 1: Clear the Clutter

The first step in organizing any area is to declutter the space. Remove anything that you don’t need to store here, including; mismatched socks, ragged towels, miscellaneous items that have accumulated over time, and anything else that doesn’t belong in the laundry room.


You’ll want to make sure that you actually get rid of these things. Meaning donating, recycling, or throwing out what you no longer want. It’s important to completely remove these things because if you don’t, there’s a good chance they’ll migrate right back to where you removed them from. By creating a clean slate, you’ll have a better sense of the available space and can start organizing effectively.


The next thing you’ll need to do is assess your vertical space. For this, I’m going to let you in on how I have maximized literally every square inch of my own small laundry room!


Step 2: Embrace Vertical Space

One of the most effective ways to maximize a small laundry room is by utilizing vertical space. I’m a big fan of storage units with adjustable shelving. I can change them as things change over time, and it allows me to use all this vertical space in the closet that might otherwise be wasted.


When you’re buying products for your laundry room, make sure you purchase items that will realistically fit. For example, we have a vacuum in here. One thing I had to consider when vacuum shopping was that there’s no outlet available in the area, so I can’t pick one that requires a wall plug-in. Plus it has to be a certain size for the designated space. So when I’m looking at buying new things, I ask myself, “Is that going to fit in my space?”


If your washer and dryer are side by side, you could also install a shelf above them to take advantage of otherwise unused space. This shelf can hold laundry essentials or even decorative items to add a touch of style to the room.


I like to keep some useful tools for the second level of my home in my small laundry room as well, so I don’t have to make as many trips around the house! In this small tool drawer, I store; batteries, picture-hanging hooks, light bulbs, felt pads for furniture legs, a hammer, a small level, a screwdriver, a flashlight, extension cords, a measuring tape, scissors, a pen, and an exacto knife. Our larger tools are stored in the garage, but these are things that I wanted to have easy access to.


In another section are my extra supplies and bulk items. Things like toilet paper, soap, bulk cleaning products, vacuum parts, garbage bags, plastic zip bags (for travel), extra laundry detergent, extra dryer sheets, clothing hangers, and a small sewing kit.


Step 3: Choose Fitting Products

When purchasing storage containers and products for your small laundry room, always, always, ALWAYS keep the available space in mind! Measure the dimensions of your closet, shelves, and drawers BEFORE you shop for anything to ensure that everything you buy will actually fit into the space. Clear containers work best in these spaces so you can easily identify the contents. And don’t forget to label them for quick access!


Step 4: Placement of Items

Consider the placement of items to enhance convenience and ease of flow in your small laundry room. Position your laundry detergent at a comfortable height. Make sure you won’t have to move anything out of the way to reach it, and that it’s secure enough that it won’t tip or drip. Use a protective liner underneath to prevent any accidental drips from staining your shelving.


Having a small folding step on hand makes a world of a difference, too! Even if you’re on the taller side, there are usually a couple of cabinets or shelves that are hard to open from tippy toes. And when we can’t reach the top shelf, things are simply not going to get put away. The brand I prefer for these is Kickerland, and their step stools come in white, black, or grey. These are very sturdy and very slim to store!


Step 5: Establish a Laundry Routine

Creating an efficient laundry routine can help keep your small laundry room organized and prevent clutter from building up. Set aside specific days for laundry and do your best to stick to that schedule. Set a goal to stay consistent for a month. Then two months. Then six months! Once you’ve developed a consistent habit of doing laundry, an organized small laundry room will soon come as a side effect.


You really can avoid overwhelming piles and maintain a tidier space by doing laundry more regularly!

✨ FREE DOWNLOAD ✨

Laundry Planner

Keep on top of laundry without the overwhelm!

Download Now →


In Conclusion…

By implementing these simple strategies in your small laundry room, you’ll be amazed at how much much bigger it will feel! A well-organized space not only makes your laundry routine more efficient but also enhances the overall functionality and aesthetics of the room.


When you can easily access, see, and reach everything you need, life gets a whole lot easier. Since laundry is going to be a part of our weekly schedule for the rest of our lives, this space should be one of the most efficient, am I right?! You got this!


Enjoy your clutter-free, maximized laundry area!


Like this article?

You’ll love this one👇🏼

50 Things To Declutter Right Now

Don’t know where to start decluttering?


Sign up for my free newsletter so I can send you the best organizing tips and strategies each week.

(and some freebies, too!)

Sign up here →

Organizing The Perfect Summer Picnic

By Blog, Checklists, Inspiration No Comments

Organizing the perfect summer picnic is a wonderful way to combine spending quality time with loved ones and enjoying the great outdoors!


Whether you’re planning a romantic date night or a fun family weekend, arranging a picnic is sure to create beautiful memories. In this article, I’ll be covering everything you need to know about organizing the perfect summer picnic; from choosing the ideal location, packing essential supplies, and planning for any type of unexpected event.


And remember to set a great example for your children and others. A successful picnic not only involves enjoying the moment but also taking responsibility for cleaning up afterward!


✨ FREE DOWNLOAD ✨

Summer First Aid Kit Checklist

Be confident in any summer emergency!

Download Now →


Organizing The Perfect Summer Picnic


Planning the Location


Scout and Pick The Perfect Spot:

Finding the perfect picnic spot is important for setting the right vibe! As well as making sure that your just-in-case weather preparations will work as desired if you need to use them.


Consider a location with picturesque views if you’d like to take photos, such as a grassy park, beach, or scenic lookout point. Take some time to scout the area in advance and choose a spot that offers enough space for everyone to relax comfortably. In some large, busy cities it can even be required to book your spot and required parking in advance, so make sure to check your favorite park’s requirements well before planning anything else! If kids are coming along, make sure there will be an area for them to play after the meal as well!


Check Out Parking Options:

Before the big day, research parking options near your chosen picnic spot. Ensuring convenient parking will save you from any unnecessary hassle or stress on the day of the event and allow you to set up your picnic with ample time. If you’re inviting guests who will be meeting you there, forward any necessary parking information to them as well.


Pinpoint the Nearest Public Bathroom:

It’s always wise to be prepared, especially if you’ll be bringing little ones along. Since nobody likes a last-minute scramble while hopping from foot to foot, make sure you have at least one option in mind before the big day. Research where the nearest public bathrooms are so you can provide directions for guests during your picnic.


Consider the Area’s Popularity:

This step is important if you want to avoid the disappointment of arriving and finding out your perfect spot has been filled by others! Find out how busy the area typically is on the day you’re planning your picnic. Google Maps can be a good reference if you are going to be at a public park as they have stats of when the busiest days and times are. Either way, plan to arrive early so you can secure your desired spot and not have to set up in a rush.


Supplies


Seating and Preparation:

Ensure you have comfortable seating by bringing along an outdoor blanket with a waterproof bottom. Some picnickers like to use a mini folding table or tray for a bit more table height and convenience. Additionally, you may want to bring wide, firm pillows for those who prefer sitting above the ground or even picnic chairs if needed.


Another way to spruce up the ambiance is to bring a portable speaker and make a curated picnic playlist in advance!


Picnic Basket Necessities:

Pack a well-equipped picnic basket or tote bag to store all your picnic necessities. To keep your food in its best condition until the event starts, bring ice packs and even a few extra in case you will need to keep some leftovers cool on the way back.


Think about including a camera to capture special moments, sunscreen to protect your skin, bug repellent or a citronella candle to ward off unwanted bug guests, and table decorations to create the imagined atmosphere. To make sure the fun doesn’t stop after eating, don’t forget to bring some cards, a board game, or a light outdoor activity to enjoy after the meal!


Serving it Up:

Gather all the necessary serving supplies well in advance. There’s nothing worse than arriving late because you were looking for something last-minute!


This includes plates, utensils for eating and serving, napkins, cups, and plenty of water. Bring a bottle opener if you plan on enjoying some beverages that will require one. Pack a cutting board and a sharp knife for any on-site food preparations. Additionally, bring salt, pepper, and any other desired condiments. This is a great time to use those extra condiment packets from takeout places I know we’ve all been “saving!” 😉


Cleaning Essentials:

Prepare for easy cleanup by bringing paper towels, wet wipes, some dishtowels (also good for packing plates and breakable items during transit), and extra food containers. Ziploc bags are also handy for packing up dirty utensils or storing leftovers. Pack a few trash and recycling bags to ensure you’re walking away from a clean space afterward. Consider bringing reusable bags to collect and transport your picnic supplies if you plan to bring a lot of items for setup.


More Tips


Keep it Fresh:

To keep your salads and sandwiches fresh, pack any wet dressings or condiments separately in small jars. Add them to your food once you’ve arrived at the planned picnic spot. This prevents the ingredients from getting soggy during transport!


Weather Preparedness:

Always be prepared for unexpected weather conditions when picnicking. Bring blanket weights or other wind deterrents to secure your blanket. If the sun is scorching or there is a possibility of rain, pick a spot with shade from trees, bring a gazebo that’s quick to set up and take down, a pop-up tent, or some large umbrellas.


Food Considerations:

Plan your picnic menu in advance, considering any allergies, dietary preferences (vegetarian/vegan), or a specific theme. Think about the ingredients, required preparation time, sealed containers to protect from bugs, and ice coolers for perishable items. If you’re having a potluck-style picnic, use Google Keep’s note feature to share with your guests so everyone is on the same page with what to bring! Pack a variety of drinks for guests to quench their thirst!


A successful picnic involves not only having a fun day with loved ones but also taking responsibility for leaving the environment as you found it (or even better!). Once you’ve finished your meal, be sure to clean up after yourselves. Dispose of trash properly and ensure recyclable items are separated as needed.


By practicing good picnic etiquette, you contribute to preserving the beauty of nature and ensure that future picnickers can enjoy the same great experience! So, gather your loved ones, follow this guide, and embark on an unforgettable picnic adventure!


Do you have a favorite picnicking spot? Comment below!


Like this article?

You’ll love this one👇🏼

Essentials for Your Summer First Aid Kit

Don’t know where to start decluttering?


Sign up for my free newsletter so I can send you the best organizing tips and strategies each week.

(and some freebies, too!)

Sign up here →