Category

Simple Living

10 Smart Home Organization Ideas

By Blog, Expert Articles, Home Organizing, Simple Living No Comments


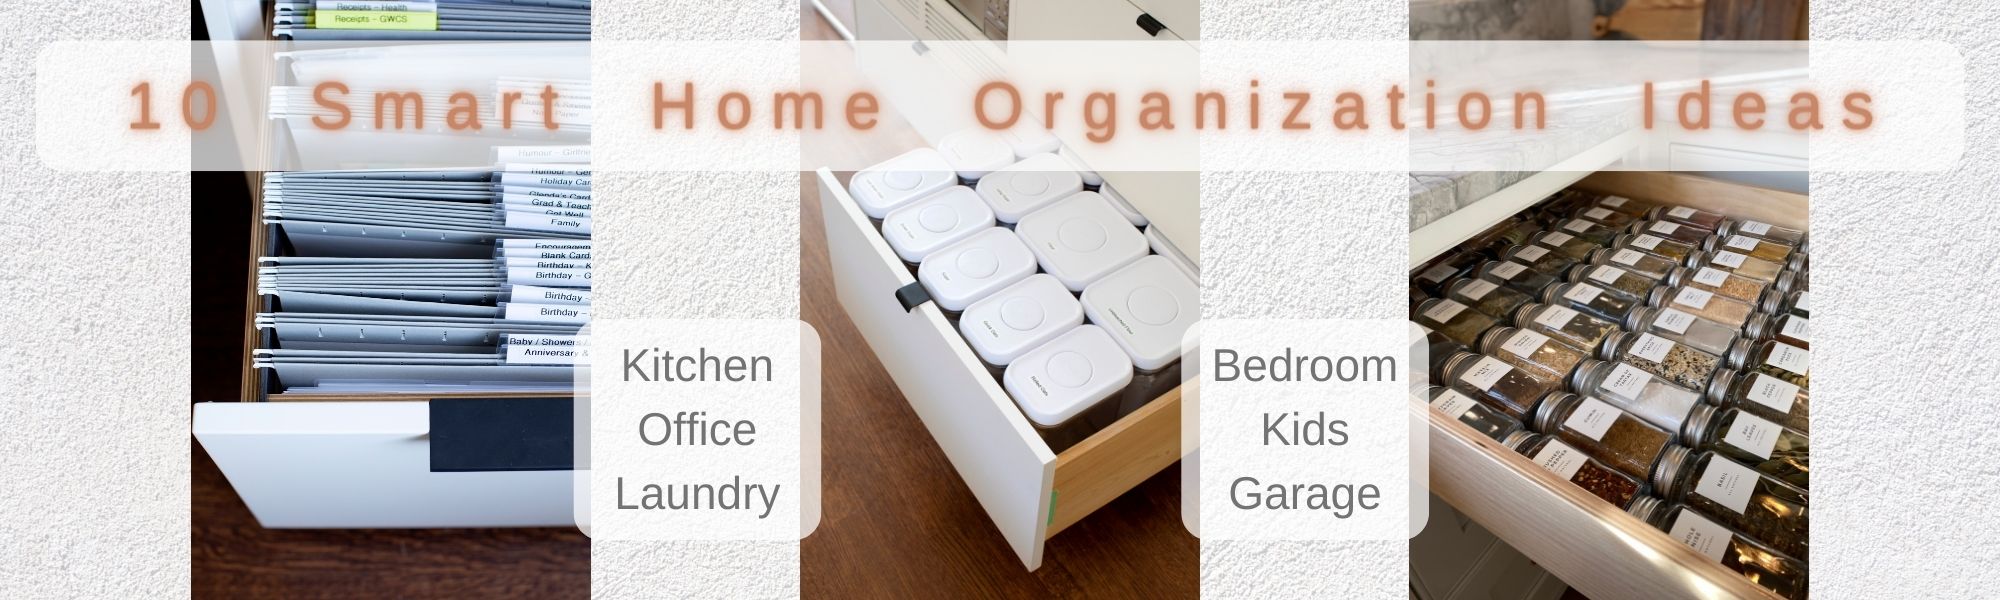
With the recent years’ influx of “smart homes,” one thing I am seeing a lot more of is smart storage!


Since there is less storage space in these small homes, we have had to get really creative with inexpensive, space-saving solutions. Often right down to the nitty-gritty of each drawer.


Not only are these little product changes making big storage impacts, but they’re also huge time savers. Bonus points for productivity!


These tips are especially useful for smaller spaces but also applicable to larger homes just the same.


Since there is no better time to get organized than the present, so let’s get right into these ideas!
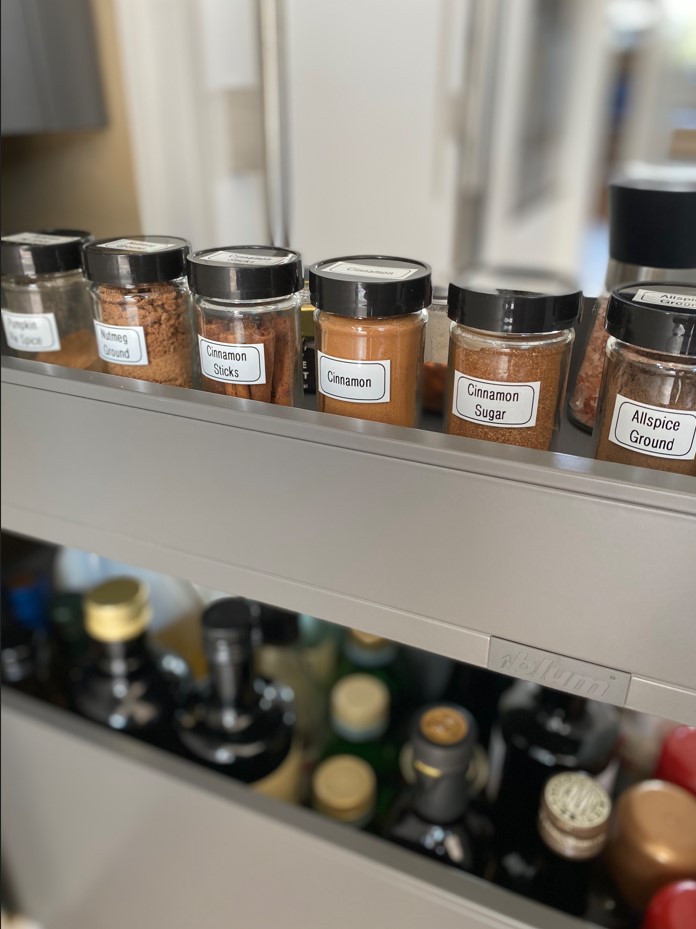
Spice Jars

These aren’t only pretty kitchen accessories – they’re super functional and space-saving too!


Instead of a drawer stuffed full of spices in plastic bags, or a cupboard of miscellaneous bottles, find exactly what you need with uniform labeled jars. These can be purchased as fancy or inexpensive as you like, with a wide array available both online and in-store.


An extra tip: use a small funnel to decant the spices and powders. You’ll save a whole lot of mess!

Turntables

One of my all-time favorite products are turntables! I love them because they are so versatile.


I frequently use turntables in kitchens for oils and sauces, liquor, and breakfast spreads. They are also very handy in bathrooms for skin and hair care products, and laundry rooms for bottles of detergent. These products come in many durable materials; acacia wood, bamboo, and acrylic.
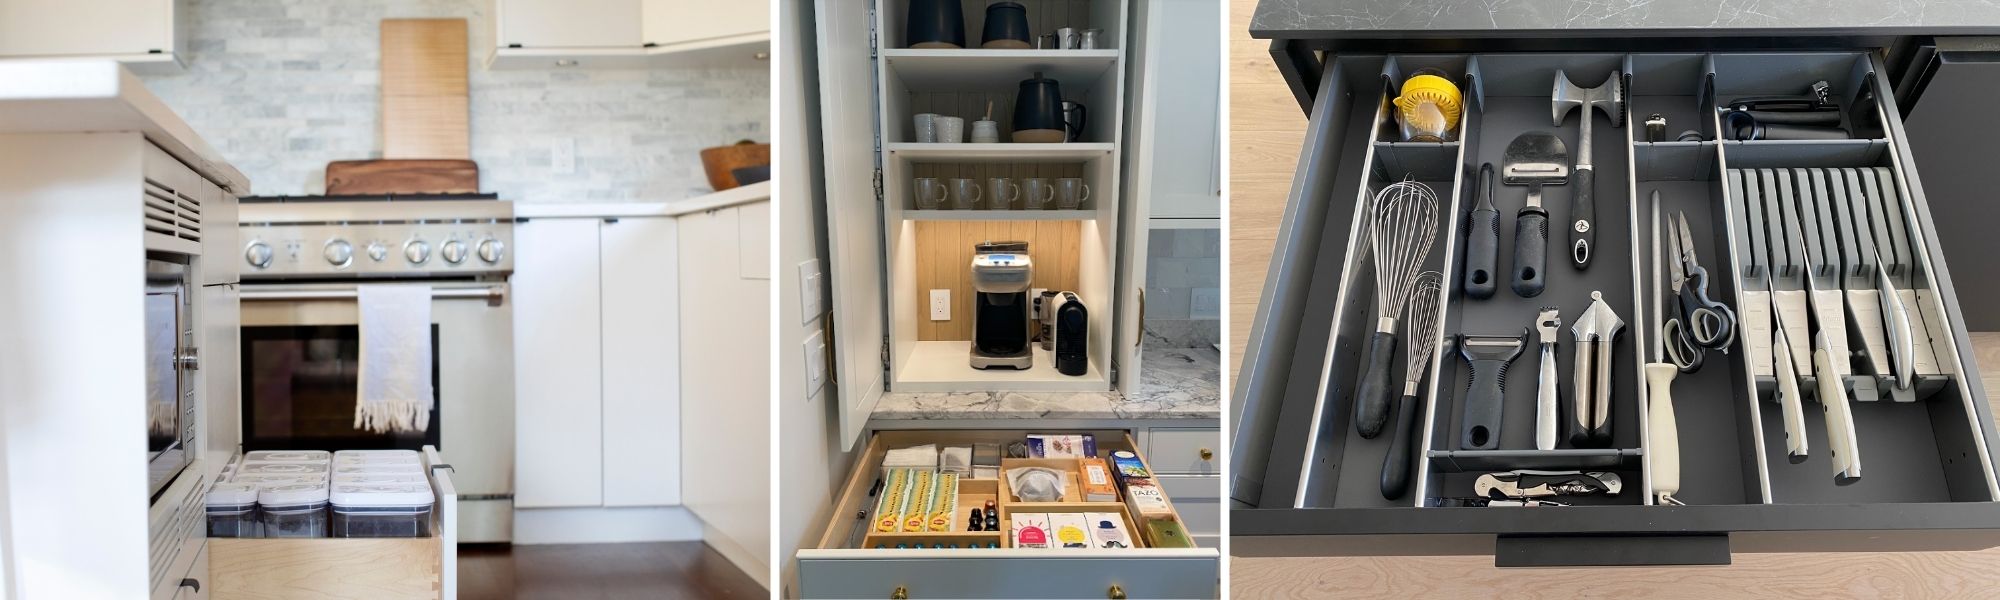
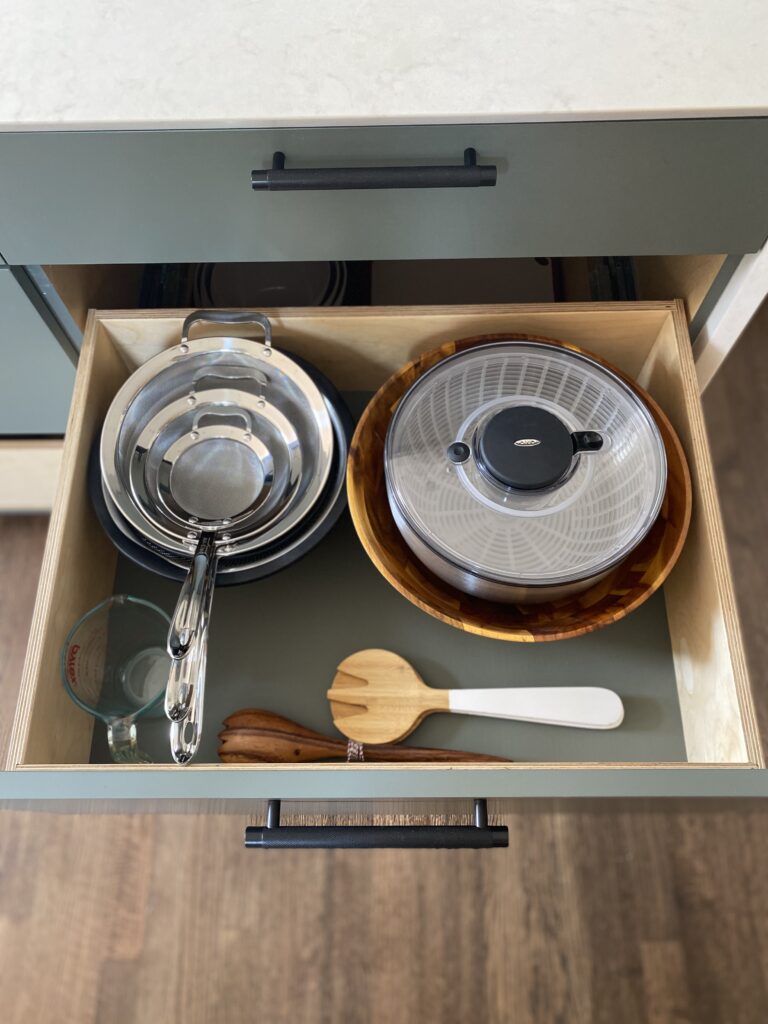
Drawer Dividers

Have you ever run into the drawer-jamming problem of that pesky potato masher getting stuck? I know I sure have!


My best solution for organizing kitchen, bathroom, and office drawers is to use dividers or small containers to keep things separate. One option I like are these bamboo drawer tension dividers. If you’re looking for a more sectional type of organization, smaller containers come in just about any material you could wish for.

Shop This Look:

Canisters in a Drawer

Say goodbye to reaching your whole arm into a flour bag! A drawer of canisters for bulk ingredients makes cooking and baking simple and accessible.


Make sure to first measure out your desired drawer for the dimensions of your canisters before purchasing! Once you’ve got them set, decant your bulk ingredients into them and make sure to label the top of the lids.

Color-Code Playroom

How many times a day do you ask your kids to clean up? Don’t worry, I won’t make you count – but I can guess it’s too many!


Turn cleanup into a fun activity for little ones by color-coding toys and books. Tidying time will turn into matching colors and become less of a chore. Plus, they will know where each of their toys are when they want to play!

Velvet Grid Jewelry Tray

Not only are these smooth jewelry trays gorgeous, but they’re also overtly functional too!


I like to use them for jewelry, specifically earrings to organize matching pairs. They also come in different sizes, so they are not always squares but can be rectangles, and there are even designs for rings to be propped up in.

Hanging Files

Useful in homes and work offices alike, this way of filing makes it easy to file papers and even easier to retrieve them.


This system is great for businesses. Keep any paper copies of legal documents safely stored in your chosen style of organization. I also use this method for organizing kids’ artwork, greeting cards, and printed photos.

Shop This Look:

Cleaning Caddy

Cleaning isn’t at the top of my fun-list, but I can make it a little less of a hassle by keeping products and accessories easy to grab and go!


Trade reaching into the back of a cupboard of loose cleaning product bottles for grabbing one easy caddy. My favorite caddy is functional and stylish, with a comfortable handle and durable bin. These dimensions easily fit into most under-the-sink storage spaces and storage closets.

Jewelry Board

One of everyone’s least favorite steps of getting ready is to approach a jumbled knot of necklaces. Often many of us will give up and suffice without one!


Keep them separated and hanging with a board attached to the back of a cabinet door, or a standalone hanging organizer. This also helps you to organize them however you please; by color, length, style, material, etc.

Shop This Look:

Garage Hooks

Most of us have a space in our garage or equipment shed where we cram gardening tools into one spot and then fight to retrieve one when needed.


Let’s cut that unnecessary frustration out and hang these tools up! With these easy-to-install hooks, you will be able to see where each item is and take them down without a problem. With materials ranging from plastic to durable metal out there, you can even hang heavier equipment too!

With all these smart storage tips, what will you do with your extra space? Do you already use some of these ideas in your home? Comment below!


Like this article?

You’ll love this one👉

Ultimate Guide: My Kitchen Organizing Process

How to Create A Cozy Fall Closet

By Blog, Closet Organizing, Home Organizing, Simple Living No Comments

Are you beginning to smell apple pies in the air? Have the leaves in your neighborhood started flashing their reds, oranges, and yellows? The season of Fall is certainly upon us!


Now that the summer break is over (aren’t we all secretly glad to return to normal routines again?) you may need to layer up over those light summer clothes. And right now is the perfect time to play keep-or-toss with your airy sundresses, bike shorts, and tank tops that have served you well over the sunny months! At the same time, you will want to bring out the warmer clothes that have been sitting in storage for the last six months.


Curating a simplified and beautifully styled closet for the colder months will:


  • Save you hours of wasted time flipping through pieces you no longer love
  • Encourage you to wear more of your clothing this fall and winter
  • Create a feeling of spaciousness and ease in your routine


So here are my top organizing tips for creating a Cozy Fall Closet:


  1. CUT YOUR CLOSET

By doing a full wardrobe edit first, you will have a clear idea of what “look” you want for the season of fall. The decluttering process is simple. Start by pulling all your clothes (then shoes, accessories, etc.) out of your closet and separate them into 4 piles:


To Keep: will wear this season

To Pack: summer must-haves

To Mend: needs stain-removal, repair, etc.

To Donate/Sell: don’t love it or won’t wear it


The more you can let go of in this stage, the more conscious your clothing choices will feel. An important phrase to keep in mind is “be relentless;” if you don’t love it, let go of anything you encounter where you don’t remember the last time you wore it.


  1. PREPARE AND PACK 

Storing summer styles elsewhere can carve out more closet space than you think. But before packing anything away, check for any stains or tears and either get them repaired now, or toss the piece away. Making sure your stored clothes are clean and in good condition will save you time come spring.


If you do have the space to keep your summer clothing in your main closet, great! The most convenient way to do this is to rotate your warmer weather clothes away into a far corner or high shelf, so that your “prime real estate” is reserved for the ones you’ll be wearing more often.

  1. DONATE OR DISCARD 

Giving up items that no longer hold value for you is not just about opening up more physical space; when you clear the old, you make space for the new! Whether it’s hopes of a new career, a new relationship, or just to welcome the season of fall. Consider how your energy will shift when you discard items that no longer support your current goals and aspirations.

One more thing – not knowing where to sell or donate items can be overwhelming, I know! Here are a few pieces of advice for that dilemma:


  • For high-end items in great condition, I recommend visiting a consignment shop. These can be in your city or online!
  • For lightly-worn business and interview attire, I love donating to Dress for Success. This company is a non-profit that empowers women entering their careers by providing professional attire.
  • For casual and more worn items, you can donate to a local Women’s Shelter or thrift store.
  1. RINSE AND REPAIR 

To set yourself up for success, start by repairing, cleaning, and tailoring your fall clothing.


First, assess all your shoes. Set aside any pairs that need to be re-soled, polished, or weatherproofed. Second, sort through your jackets, dresses, and blouses for any that need to be dry-cleaned, mended, or tailored.

  1. THE PERFECT PIECES

Now that your wardrobe has been edited, consider what clothing pieces would fill in the gaps of your collection. A capsule wardrobe is simple and fantastic to work with because it completes your closet with chic, high-quality pieces that mix and match easily. Consider which of your pieces you often skip wearing because they need “the right skirt” or pair of boots.

By adding a few intentional pieces, you can round out your wardrobe and make it a little more like your current taste with some new items (plus it’s an excuse to shop!)


With all this preparation and organization behind us, and now that you know how to create a cozy fall closet, how are you going to reward yourself for a purge well done?! Comment below!


Like this article?

You’ll love this one👉

Organizing Your Closet Twice a Year Can Help Your Favorite Charity!

Ultimate Guide: My Kitchen Organizing Process

By Blog, Home Organizing, Simple Living 2 Comments

Do you know what the most frustrating room for the majority of people to organize is?

If you guessed the kitchen… you’re right!

A kitchen is often seen as the least approachable room in a home to organize because it’s one of the bigger spaces, but it’s filled with so many small items!


Think about it, you have eating and serving utensils, pots and pans, a morning beverage zone, mugs and cups, serving and eating dishes, baking items, special holiday items, and so much more!

With all of this in mind, I wouldn’t be surprised if you feel a little anxiety creeping up – but relax! Through this guide I will take you on a complete walkthrough of my kitchen organizing process. Hopefully I can show you that once you’re through the messy parts, the rest is simple (like tetris) and just consists of fitting the puzzle together.

Let’s begin!


When starting to plan a kitchen,

I always work with your desires and will ask questions in order to create the plan with you.

First I’ll ask,

What does your dream kitchen look like?

What’s not working in your kitchen right now?

What do you have for breakfast? Do you want a coffee & tea station?

Who does the cooking? Do they like to bake?

What are the essential items that you need access to most frequently?

Do you have inspiration pictures to show me?

What look do you want to go with for containers? (glass, wood lids, OXO type containers, etc.)

I’ll need to know what you use daily vs. once in a while. That determines what items get stored on higher shelves or further back in deep cupboards.

Secondly I’ll ask,

Where would you like to do your meal prep?

Typically, it’s close to the sink or on the kitchen island. This is the first step in planning where things will go.

This step is something most don’t think about doing. Open all the cupboards and drawers in the kitchen and take a step back to look at your kitchen. Imagine how you want it to flow.


Next, create zones in the kitchen.

These zones are for the different activities based on your personal needs.

We already know the meal prep zone, so we just need to decide where the breakfast zone will be, the baking zone, cooking zone, oils & vinegars, spices, pantry foods, vitamins and supplements, food wraps, dishes, cutlery, glasses, tea and coffee mugs, food containers, kids lunch containers, baby food and bottles, pots & pans, etc.

Then we need to see the zones in action.

I like to use sticky notes and place them on drawers and cupboards.

Most people are very visual and this helps with the planning process. The other way I can do this for new construction or kitchen renovations, is by writing on the actual plans.

Once the kitchen is planned out,

I pull each section’s items out and re-arrange them according to our new plan.

This is where most people get really stressed and want to run the other way. However, you must remember that an integral part of organizing is the mess and chaos. But also keep in mind that it will get worse before it gets better.

I’m also here to help coach you through this stressful, overwhelming stage.

Once everything is in its new place,

I will then measure for containers and drawer inserts to create a shopping list. This is the fun part! Notice how I didn’t go shopping first, then start asking questions and organizing after? You don’t know what containers are going to fit until you have all your items planned and organized.


The next step,

Is to label containers and install them as planned.


Then we can take a step back and admire your beautifully organized, and highly functional kitchen. At this point, you’ll be so inspired to maintain it and keep it looking organized!

So in the end, does it really seem so stressful? With a vision and a bit of pre-planning, everything comes together very smoothly. The hardest part is to power through the warzone phase, and once you’re on the other side the rest is a breeze!

If you’re interested in working with a professional organizer either in-home or through virtual consult, visit me on my Services Page to learn more about how I can help you design and maintain the home of your dreams!

And yes, it is attainable for everyone!


Like this article?

You’ll love this one👉 Why the Kitchen is the Heart of the Home